Grafting - How to...

Here are my step-by step instructions for grafting your sock toes - or anything else that might need it! If you're using a tablet or smart phone, just scroll down - they should all be in the right order! If you're on a computer, scroll down the left hand side and then come back to the top, to the right hand side. All captions and photos are numbered.

If you just want the written instructions, click here!

1. Arrange stitches so that the yarn is at the right hand end of the back needle (the one with the teeny arrow pointing to it)

2. Cut yarn leaving the end a generous 5 or 6 times the width of the stitches (you really don't want to run out!)

3. Insert the darning (d.) needle (with the yarn  threaded through it) into the first stitch on the front (knitting) needle as if to purl the stitch

4. Pull the yarn through and leave the stitch on the knittingneedle

5. Insert the d.needle through the next stitch on the back knitting needle as if to knit the stitch

6. Leave the stitch on the needle

7. Insert d. needle through first stitch on front needle as if to knit it...

8. ...and carefully push this stitch off the needle

9. The stitch is now off the needle (sorry about the photo!)

10. Now insert the needle through the next stitch on the front needle as if to purl it...

11. ...and leave the stitch on the needle

12. Now insert your d.needle through the next stitch on the back needle as if to purl it...

13. ..and carefully push this stitch off the needle

14. The stitch is now off the needle, so...

15. ...insert your d.needle through the next stitch on the back needle as if to knit it, but...

16. ...leave the stitch on the needle. Now you need to give your yarn a bit of a tug (not too much) to tighten the stitches a bit. Practice will result in you getting this right for your knitting tension. Early attempts may end up a bit tight or loose - or even both! Don't worry...you will improve!)

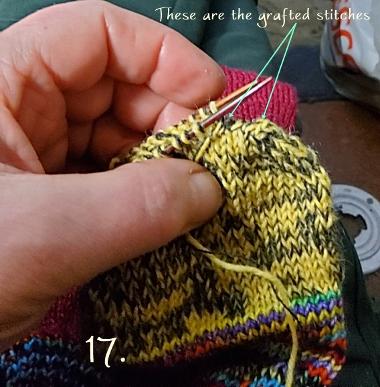
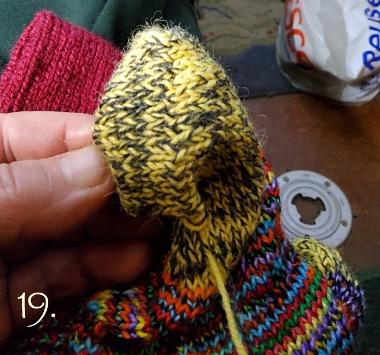
17. Each time you move the yarn from the front to the back or vice versa, give it a bit of a tug. By the time you've done a few stitches, you will be able to see the results of your intense efforts...

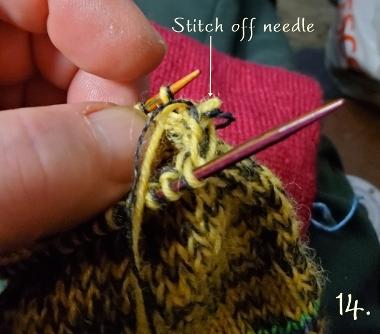
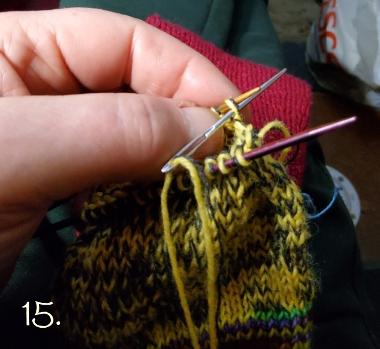
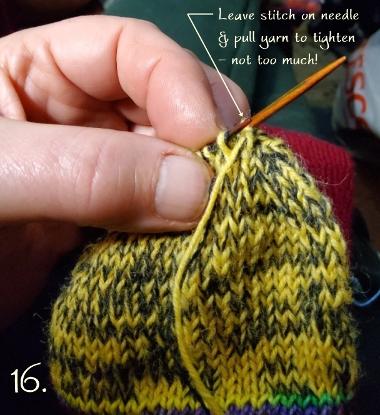
So - my "mantra" if you like - for remembering the steps is: purl on [front needle], knit on [back needle] (to start with), then  *knit off, purl on [front needle]; purl off, knit on [back needle], rep from * always going from the front needle to the back needle and then to the front needle, and so on. This still goes through my head even now - and I've grafted countless pairs of socks and even some hats & jumper shoulders!

18. Sorry - another dodgy photo! But you get the idea.

19. Congratulations! You've done it... stitches look a bit odd in the photo but I think that's because I've got 2 yarn colours! Weave in the end(s) of the yarn securely but smoothly, so that there are no bumps to annoy your toes!

All text, images and designs are © Helen MacGregor 2023